How To Supply Artwork For Kiss And Die Cutting
Die cutting is the process of using specialist tools to create custom shapes out of materials such as paper, card or even adhesive vinyl to make stickers. Traditionally, metal dies are created that match the shape of your design and then those cutting plates would stamp out each shape. Another way we can die cut is by using our in-house Veloblade. This exceptional tech utilises laser sensors and an oscillating blade to cut designs from a single sheet with remarkable accuracy. From cake-shaped bake sale flyers to holographic foil backed business cards, we can capture the essence of your custom designs allowing you to create products with extra care, consideration and quality.
The Different Types Of Die Cutting
There are slightly different processes for Die Cutting, Double-Sided Die Cutting, Die-Cut Packaging, Perforated Die-Cutting, Kiss Cutting and combining Die and Kiss Cutting but fear not, we are here to guide you through the entire setup process making sure you are comfortable from the prepress stage right the way through to having print ready files.
To simplify the entire die cutting process, we need to consider the depth that the die is allowed to cut into our material. Whether that means cutting all the way through in a traditional die cut format, partially cutting into multiple layers (known as kiss cutting), scoring to create fold lines (which is great for packaging) or even a combination to create perforations and padding. We can do it all thanks to our traditional die cutting techniques coupled with our contemporary technology (which is literally cutting edge!) Our Veloblade die cutting machine uses a camera to detect registration marks, ensuring the cutting process is fast and exceptionally precise.
As we have a variety of die cutting methods available, you can relax knowing that we can complete large order quantities, single, duplex and even triplex thickness (up to 800gsm), laminate applied to one or both sides of the print. We can also cut and shape complex designs such as custom packaging, sticker sheets and individual stickers with padding. We have a guide on double-thick (Duplex) if you wish to learn more about the benefits of using a thicker cardstock for your products.
So we’ve learnt about the methods of die cutting and some of the ideas you can use to create memorable products for your customers, clients or supporters. So go ahead and open up your favourite Adobe software (or Photoshop Alternatives), load your artboard and let’s apply these guidelines to make sure we have perfect die lines!
If you are struggling at any point with image intricacy or you just need a little more help getting set up with your artwork, we have a lovely team of in-house graphic designers who are ready to assist you with your die cut shapes. Give us a call today to transform your next die cut concept into an immaculate precision-cut reality with Aura Print!
How To Supply Artwork For Die Cutting
To supply your artwork for die cutting items such as custom bookmarks and business cards, our design team needs three high print quality images from you.


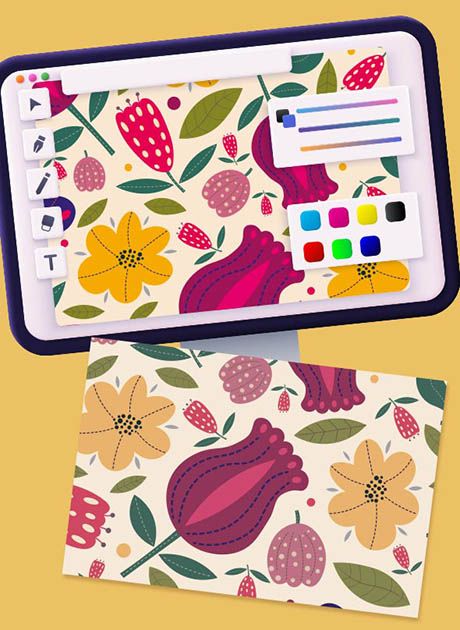
Your completed design.


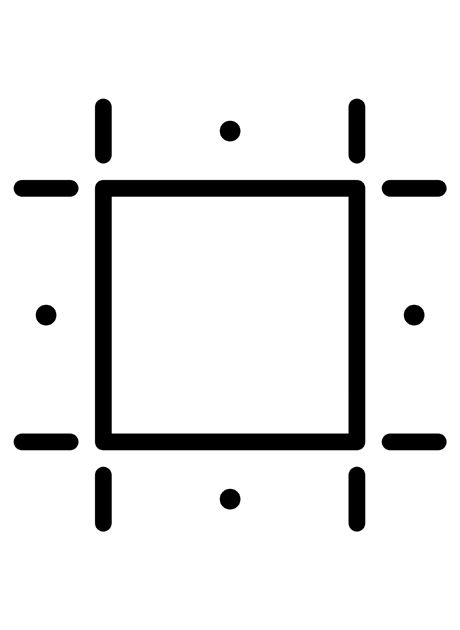
The shape you require your print to be (known as the cutline).


An image of your design and print together (known as the composite).
Let’s take a look at the example below:


Desired


All areas to be printed, NO CUTLINE


Cutline
Desired shape as a 1pt stroke


Composite
Show how the shape and print look together
Whether you want to use unique files or different pages of a PDF – the choice is up to you, but the three images do need to be separate from one another.
Please make sure that your designs have the appropriate crop marks and bleed and the cutline for your shape is a continuous stroke (ideally 1pt thick and pink). The reason we ask for three images is so there is no issue of bleed lines or crop marks printing with the final print, but there is a clear understanding for our team of how you wish the print to look. Check out our guide if you would like to learn more about image resolution and a breakdown of image formats.
How To Supply Artwork For Double-Sided Die Cutting
For double-sided die cuts such as double-sided business cards and custom made flyers, we require five images as we need to ensure your design is arranged correctly on the reverse side.


Your completed design, both front and back.


The shape you require your print to be (known as the cutline).


Front and Back images of your design and print together (known as the composite).
For example, if you have a double-sided asymmetric design, we need to understand how you want both sides of the print to look once the item is complete. The shape that you will see on the front side will appear to be flipped when you rotate it to face the back. With the composite supplied we can confirm exactly how you want your print to look from all angles.


As the shape flips when you turn it from front to back, make sure you don’t get caught out with your print. Too many times have we seen text being chopped off as it has not been adjusted to match the mirrored back shape. At the proof stage, our team will show you where the front and back shapes will land. If you do forget to flip, you'll have another chance here to correct it before printing.
Please ensure the cutline for your shape is a continuous stroke (ideally 1pt thick and pink). If you wish to provide unique files or different pages of a single PDF – that choice is up to you, but the five images do need to be separate from one another.
If you wish to learn how to put crop marks in indesign for each of your designs, or ai border design creation, please make sure that you are checking our guide to bleed marks.
How To Supply Artwork For Die Cut Packaging
Our custom packaging options combine both cut and fold lines which are perfect for elevating your brand visibility, and a great way to offer customers a long-lasting impression. Cut lines shape the product and fold lines allow for easy package assembly. Colour coding the cut and fold lines will allow our team to determine which is which. Ideally, pink lines should be used for the cut and blue lines should be used for the folds.
To supply die cut packaging designs, our team needs three high print quality images from you.


Your completed design.


The shape you require your print to be (known as the cutline).


An image of your design and print together (known as the composite).
All packaging contains “hidden” areas of print - parts of print that will no longer be visible once the item is assembled. There’s nothing to stop you from putting print here but beware that it will not be visible!
You can request custom box templates from our team – it will be labelled with the print and no print areas just for you.
If you want to use unique files or different pages of a PDF – the choice is up to you, but the three images do need to be separate from one another.
Please make sure that your designs have the appropriate bleed and crop marks and the cutline for your shape is a continuous stroke (ideally 1pt thick pink for cutlines and 1pt thick blue for fold lines). The reason we ask for three images is so there is no issue of cutlines, fold lines, crop marks or bleed with the final print, but there is a clear understanding for our team of how you wish the final print to look.
You can request custom box templates from our team – it will be labelled with the print and no print areas just for you.
How To Supply Artwork For Perforated Die Cutting
If you are looking to create perforated tickets with a single tear away section, then they may not necessarily need to be die cut. However, we have just the ticket as singular perforation lines can be run through our specialised perforation machine or even completed by hand.
However, if your artwork contains any of the following, then die cut perforation is for you:
· Perforation lines that end part way into the sheet.
· Vertical and horizontal perforation lines on the same sheet.
· More than three perforation lines on the same sheet.
To supply die cut perforation designs, our team needs three high print quality images from you.


Your completed design.


The shape you require your print to be (known as the cutline).


An image of your design and print together (known as the composite).


This time, instead of a solid line, we need a dashed line. This lets our team know that you want perforation and that you haven’t selected perforation by mistake (it does happen!) If you want to use unique files or different pages of a PDF – the choice is up to you, but the three images do need to be separate from one another.
Please make sure that your designs have the appropriate bleed and crop marks and the cutline for your shape is a dashed stroke (ideally 1pt thick and pink).
How To Supply Artwork For Kiss Cutting Stickers
We have two different options for our kiss cut stickers – “on sheets” and “individually cut with padding”. Both options have unique applications and benefits, and it may be situation-based which option is preferred.
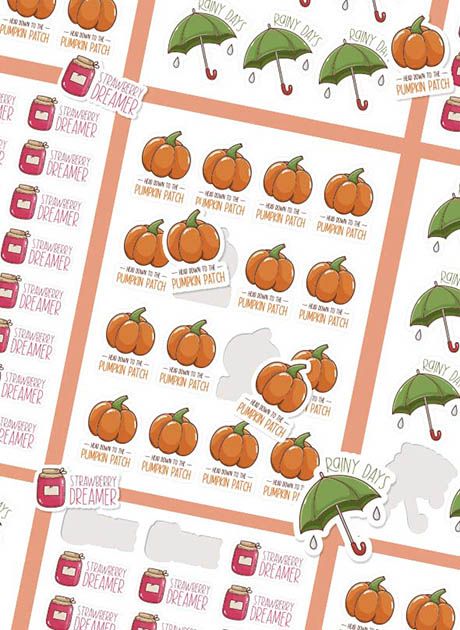
Stickers on sheets are, as the name suggests, stickers on a sheet. Our artworkers will perform a precise cutting sticker kiss cut technique to duplicate your design across a single sheet, filling the page with as many of your designs as possible. Each sticker has a kiss cut, remaining altogether on the same sheet ready to be peeled off by you at a later date.
To supply kiss cut sticker designs, our team needs three high print quality images from you.


Your completed design.


The shape you require your print to be (known as the cutline).


An image of your design and print together (known as the composite).


If you want to use unique files or different pages of a PDF – the choice is up to you, but the three images do need to be separate from one another.
Please make sure that your designs have the appropriate bleed marks and the cutline for your shape is a solid stroke (ideally 1pt thick and pink).
How To Supply Artwork For Individual Stickers With Padding
Our second uniquely shaped sticker option is individual stickers with padding. This option requires two cutlines as they are both kiss cut and die cut.
The first cutline is the kiss cut shape which should be the size you’d like your sticker to be. The second cutline is the die cut shape which needs to be 5 mm larger than the kiss cut shape to give yourself some room to be able to peel the sticker.
To supply padding designs, our team needs three high print quality images from you.


Your completed design.


The shape you require your print to be (known as the cutline).


An image of your design and print together (known as the composite).


As with all our die cut products we require 2 mm worth of bleed, but with the kiss cut with padding, we require an additional 5 mm bleed on each edge. The reason for this huge jump in bleed is to account for the area between the kiss cut and the die cut. That extra area needs to be printed too, so give it some love with 7 mm bleed.
Now that you are perfectly positioned to be a print prep professional, with a clear and concise understanding of the differences between perforations and padding. You know your PDFs from your printmarks to ensure your precisely prepared prints are perfectly positioned. If you do have any queries, questions, comments or concerns feel free to contact the team where we will be happy to help.

 USA
USA FR
FR
