USA
USA FR
FR


How To Make Business Cards In Word
Knowing how to make business cards in Word is a quick and simple way to kickstart your company’s advertising. Word may be known as a document creator, but it is surprisingly handy for making professional business cards.
Having a set of business cards is still considered essential to your business. Our business card survey revealed that now more than ever, companies are spending more on business card printing. And they’re certainly seeing the benefits.
So, how to make a business card in Word? We’ve got two different ways to show you how to make a business card in Microsoft Word. Plus, it wouldn’t be an Aura Print post without extra tips and tricks to help your Word business cards stand out for all the right reasons.
How to make a business card template in Word?
Microsoft Word has some wonderful, pre-made business card templates. What’s great about Word templates is they are all easy to edit and come in a range of styles to pick between.
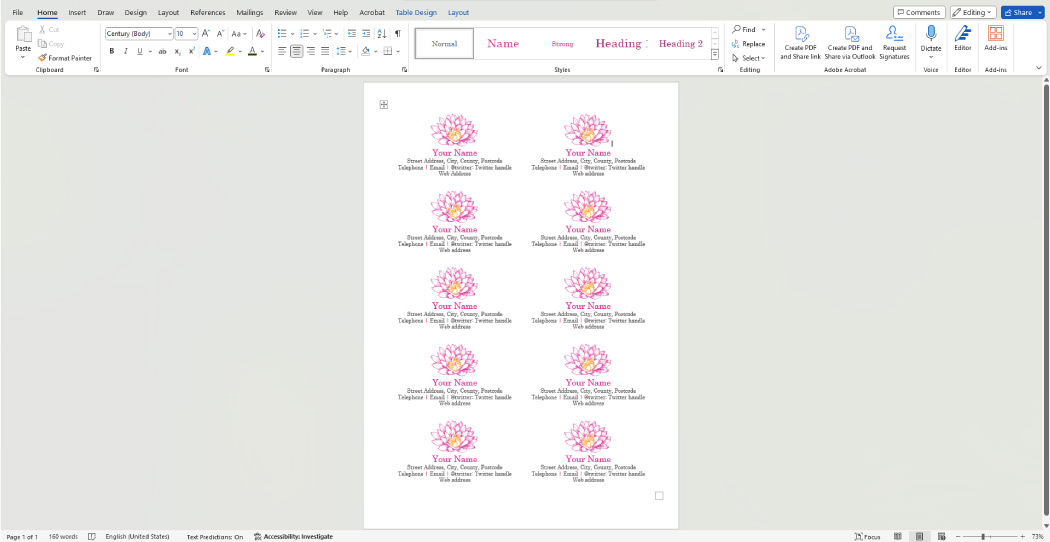
Step one: browse Microsoft Word’s business card templates
To find Word’s business card templates, open Microsoft Word and select New. Then search for business cards in the top bar. Word will then load all the business card templates on offer.
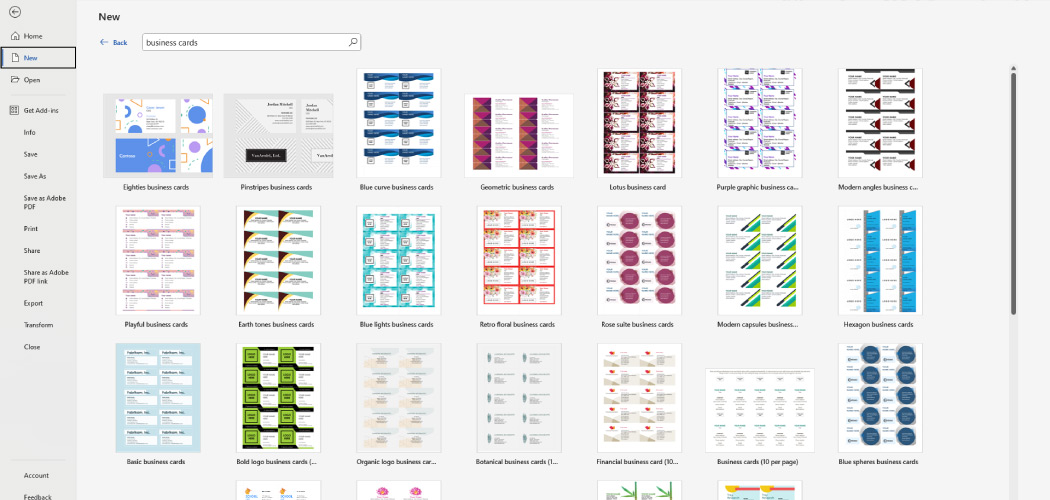
Clicking each template will enlarge the image, giving you a better view of the design before you make your decision.
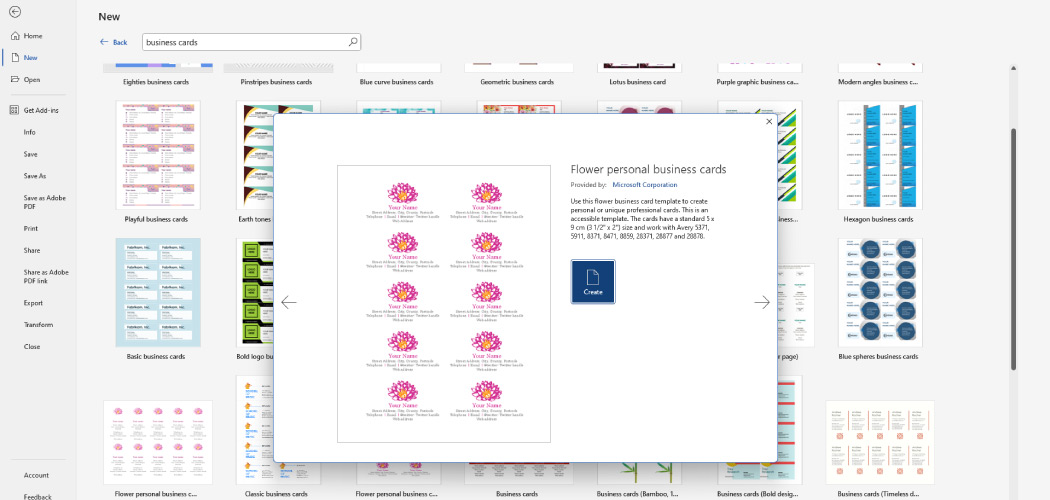
Select your template and click the Create button. Doing so will take you to a screen that looks like this:
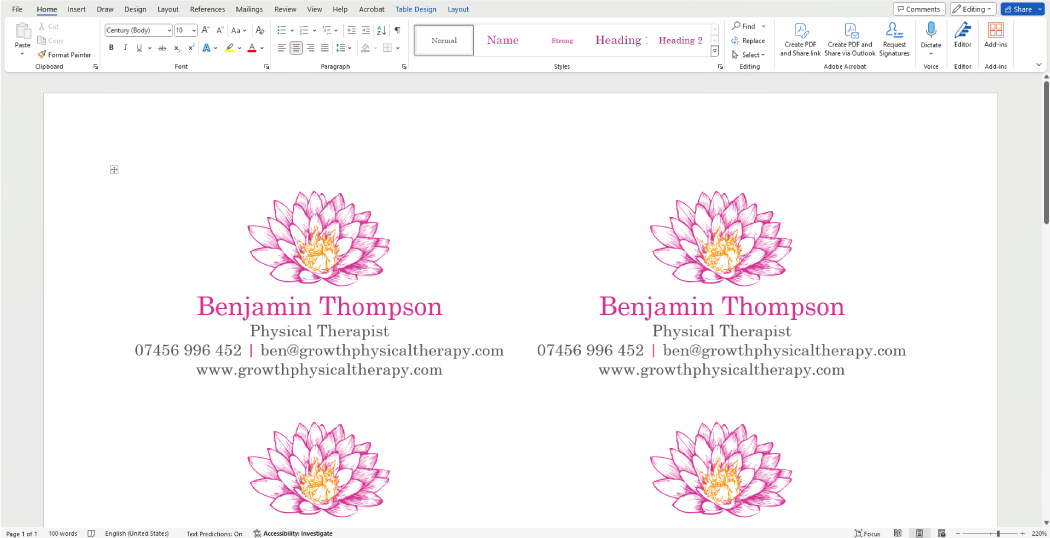
Step Two: Add your text to your Word business card template
With your template loaded it’s time to start making the business card more “you”. We recommend adding your text first. To do this, click where you want the text to appear, remove what’s already there, and type your own words in the space.
Remember, business cards have a limited area to work with. Too much text overcrowds your business card and quickly becomes a nightmare for your customers to read.
Most business cards will include the following details:
• Employee name and/or company name
• Job title
• Telephone number
• Email address
• Website
• Social media handles
• Address
Interested in the dos and don’ts of business card design? Our what to include on a business card blog covers the topic in more detail.
Changing the text on one card will automatically update the text on all ten cards. Templates created by Microsoft all auto-update with any text and styling changes.
Step three: Edit your Word business cards to fit into your brand
The text is all on the page so now it’s time to get creative.
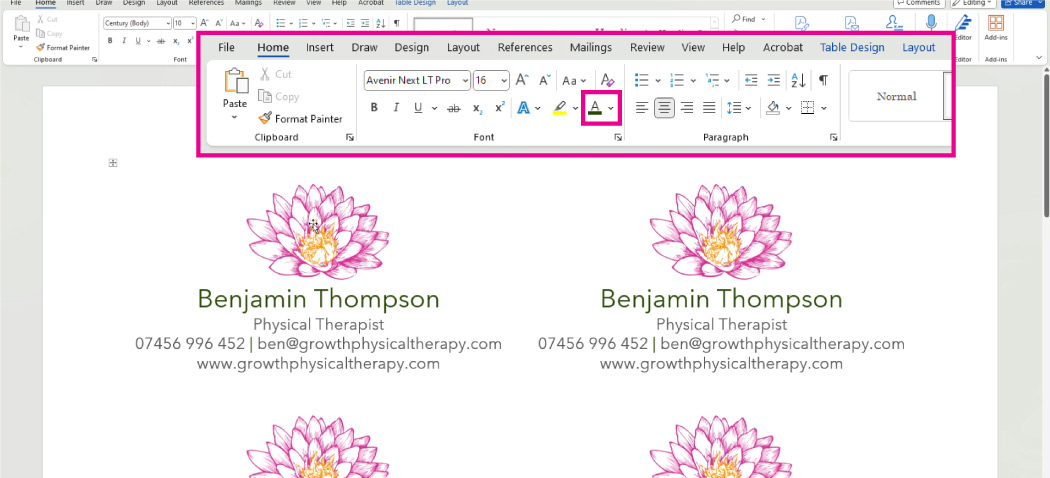
First, we’re going to change the font. Word comes with plenty of fonts pre-installed so take your time and see what’s available. For this design, we’ve gone with a sans-serif font for a more modern appeal. The font we've picked is Avenir Next L T Pro.

After that comes colour. Word will provide you with a colour palette based on the template you’ve chosen. To change the text colour, highlight your text and click on the text icon in the home tab. You’ll then be given a drop-down menu with all your colour options.
But what if you don’t like any of the colours in this drop-down menu?
In this case, you can make yourself a custom colour. We’ve created a custom colour for this design and done so by selecting “More Colours…” from the drop-down menu. A pop-up window will appear with a whole rainbow to slide through. Or you can always insert the colour code of the shade you’re wanting.
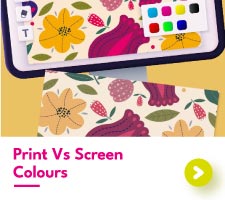
Colours on screen will look different when they are printed. For more on colour printing, check out our print vs screen colour guide.
Step four: Add your logo to your Word business card
Your business logo helps to distinguish your brand, making you more recognisable to your customers. It therefore only makes sense to add it to your business card.
To do so in Word you’ll need to delete the image already in place. Then, select Insert tab > Pictures, and navigate to your saved business logo. Jpeg and PNG file types are both compatible with Microsoft Word.

Your logo isn't going to fit perfectly straight away. Resize it by clicking and dragging one of the corners of the transform box around your image.
Step five: Word tips for standout business cards
Your text is placed, colours are picked, and logo has been added. You may be completely happy with the result of your design efforts and be thinking about getting your business cards printed.
But we’re a print studio. We know there’s more that can be done to design business cards that don’t look like they’ve come straight from Microsoft Word.
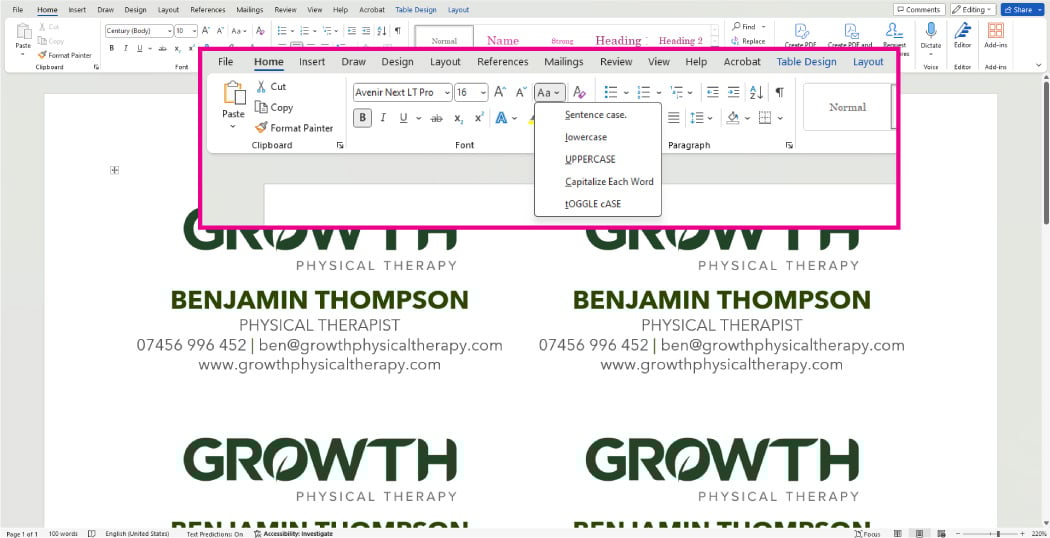
Let’s start with the text – it all looks the same! To change that, Word has an array of options to play with. For this design, we’ve made the name bold and changed the sentence case to uppercase. We recommend using the Sentence Case button to do this in case you change your mind later.
Now let’s space the text out so it isn’t all crammed together. Select the text that is above the text you want to move. Then go to the line spacing button and change the line distance. This will move the text below to be further away, providing a little breathing room in your design.
The line spacing we’ve chosen for this design is 1.5.
With the final tweaks done, print a test of your business cards. A test print will show you the size of your text and logo before you go to print a full batch.
How to make business cards in Word without a template
Sometimes, Microsoft Word’s templates won’t speak to you. But that's okay as you can create a business card from scratch in Word.
Step one: Create a business card sized Word document
Create a blank document in Word by selecting New from the file tab. The document will open as an A4 which is too big to serve as a business card. To change the document size go to Layout > Size > More Paper Sizes.
Under the Paper tab select the Paper Size drop-down menu and scroll to the bottom to Custom Size. Now you can change the size of your document to fit a business card. Business cards come in a variety of sizes, so it's up to you which size you decide to pick.
Here are the standard business card sizes for reference:
• UK: 85mm x 55mm (8.5cm x 5.5cm)
• USA: 89mm x 51mm (8.9cm x 5.1cm)
• Japan: 91mm x 55mm (9.1cm x 5.5cm)
At Aura Print, we know a lot about business card sizes. So much so that we have our very own dedicated blog post all about What size is a business card - check it out!
The final thing you need to do before hitting enter is to add a bleed area. Having a bleed area is crucial to create a professional business card. To learn more about print finishing and bleed, we have a post for that too.
Add 4mm (0.4cm) to both the width and the height and you'll have a bleed area. That wasn't too hard was it?

Step Two: Change the margins
After changing the document size you'll also have to change the margins. The current margins are designed to fit an A4 but now that your document is smaller, the margins will also need to be smaller. Go to Layout > Margins > Custom Margins.
From here, change the margin to 0.7cm on each edge. This leaves you with a nice gap between your design and the edge of the page.

Step Three: Create your Word business card design
With the page now set up you can now begin with the design. As we are making business cards in Word without a template, the design you choose is completely up to you.
With our Word business card design without a template, these are the steps we took to create the design.
First, we typed out the text we wanted to include on the business card design. Instead of the default font provided by Word, we changed the font to Garamond.

Text typed out, we headed up into the styles panel and clicked Heading 2. This has stylised the first line of text to be larger than the rest. Then we changed the fonts colours to a dark orange and a grey tone.

We then added the company logo to the design. Under the Insert tab we went to Pictures and then inserted the logo image file. At first, the logo file completely altered the layout of the business card. To stop this, we changed the image setting to "tight" and scaled the file into position.

The business card was looking uninspiring. Using the shape tool, we drew two rectangles and added them to the bottom of the card.
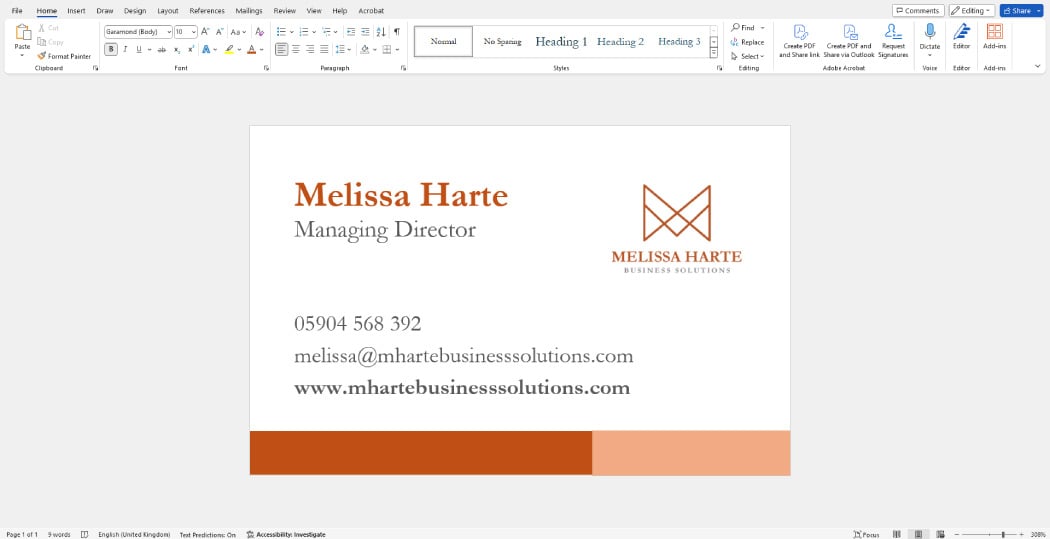
And to finish the Word business card, we dropped in some icons to go alongside the contact information. In the Insert tab, we went with Icons and searched Word's available images using the search bar. The chosen icon was made smaller and positioned over to the left. After that, it was just a case of changing the colour using the Graphics Fill button in the Graphics Format tab.
![]()
Step Four: Save your business cards for print
Design complete the last step is to save your file to prepare it for print. Word provides you with multiple file types to choose from - our personal preference for print is a PDF. Simply head to the file tab, select Save As, and choose PDF from the drop-down menu.
We don't recommend printing your business cards on your office printer. Office printer paper is thin and flimsy, hardly giving you the finish to impress your customers.
Printing your business cards with Aura Print ensures that your cards will have that premium edge. We're all about choice. In fact, with over 10 unique paper types and paper weights, you're absolutely spoilt for choice! Check out our high-quality business card printing or order yourself a sample pack today.