UK
UK FR
FR


How To Check Your Foil Printing Proof
How To Check Your Foil Printing Proof
So, you’ve received your foil art printing digital proof from our team. That’s great! Now it’s time to check over your proof before giving the go ahead to whisk your artwork away into production.
But there’s just one thing in your way. Understanding what the digital proof is actually showing!
Together, we’re going to take a quick look at what your digital proof represents and how to know whether it is the right time to approve your artwork for production.
Foil Sandwiches: Stick With Us Here
Before looking at your digital foil proof, lets first have a quick stop tour of the metallic foiling process.
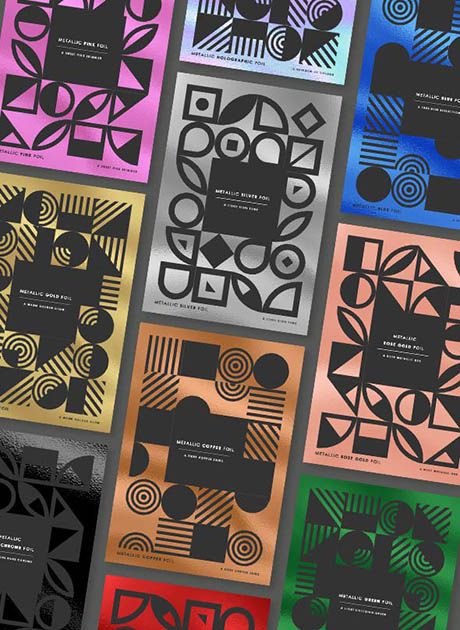
Metallic foiling can best be described as a sandwich. The process is made up of layers that come together in a specific order to create something delicious. Knowing how these layers interact is sure to help you when making your designs and checking your foil proof.
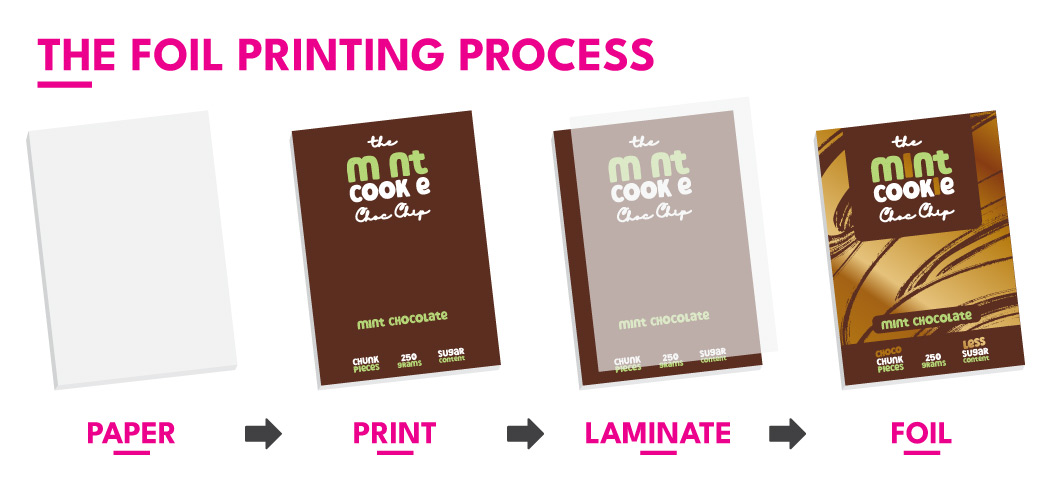
The first layer is the paper. This is what everything will sit on top of. Metallic foil is available on white and colourful paper stocks, so you’ve a lot of choice for the base of your foil sandwich.
Next up comes the print. The print is applied directly to your paper of choice. There is often some confusion around the print and foil order. But, as you’ll find out, the foil part comes in a little further down the line.
After your printed design is added, a soft touch lamination is then layered over the top. Soft touch laminate is an essential part of the metallic foil process. We are simply unable to foil without it. With a buttery velvet feel and matte look, soft touch laminate isn’t just required, it's fabulous!
Finally, the part we’ve been waiting for. The foil! In the foiling process the metallic foil is applied last. As the foil is not see-through in the slightest, it will cover any print underneath completely.
And there you have it. The foil sandwich. Ok, maybe it isn’t really much of a sandwich, more like a grilled piece of bread stacked with goodies. But you get the point. Foil printing is made of steps that are always done in the same order.
Your Foil Printing Proof: What Does Each Page Show?
So, we have a better understanding of the foil process, now it’s time to get to grips with your digital foil printing proof. After placing your order and supplying your artwork files to the team, you’ll receive a digital proof that will look like this:
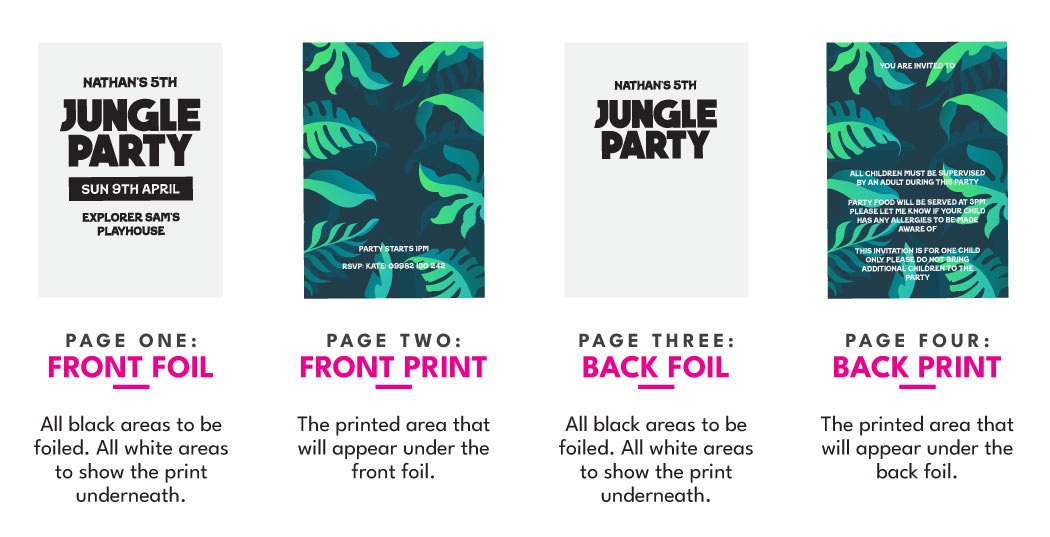
In this example we are looking at a double sided piece. This digital proof is made up of 4 pages, each representing a different step of the foil printing process. Here is what each page represents:
• Page One: Front foil in black
• Page Two: Front print
• Page Three: Back foil in black
• Page Four: Back print
Page one – the front foil – will be applied over the top of page two – the front print. Page three – the back foil – will be applied over the top of page four – the back print.
When we break the digital proof down, it starts to become a lot easier to understand. Just don’t forget that the foil will cover the print underneath so don’t put anything important in areas the foil is designed to land.
Other Things To Know About Foil Printing
Foil printing is an absolutely beautiful finish that can be added to your business cards, bookmarks, and greeting cards. It is one of our favourites here at Aura Print, with more and more of our customers converting to the shiny foil lifestyle.
However, we’d be lying if we said that the foil process is perfect every single time. Wouldn’t that be wonderful?
As part of your foil proof, our designers may alert you to some potential issues surrounding the foil. Let’s have a look over at the common things raised at the proofing stage and what you can do to get around them.
Foil Movement Tolerance
Like with all print, foil has its own special movement tolerance. A movement tolerance is the chance of something moving from its original and intended position. Our digital foil has a movement tolerance of up to 1mm.
What this all means is that the foil has the ability to land in different places on each print. Sometimes it will be a little over to the left, sometimes a little over to the right. And sometimes it will hit the bullseye bang on.
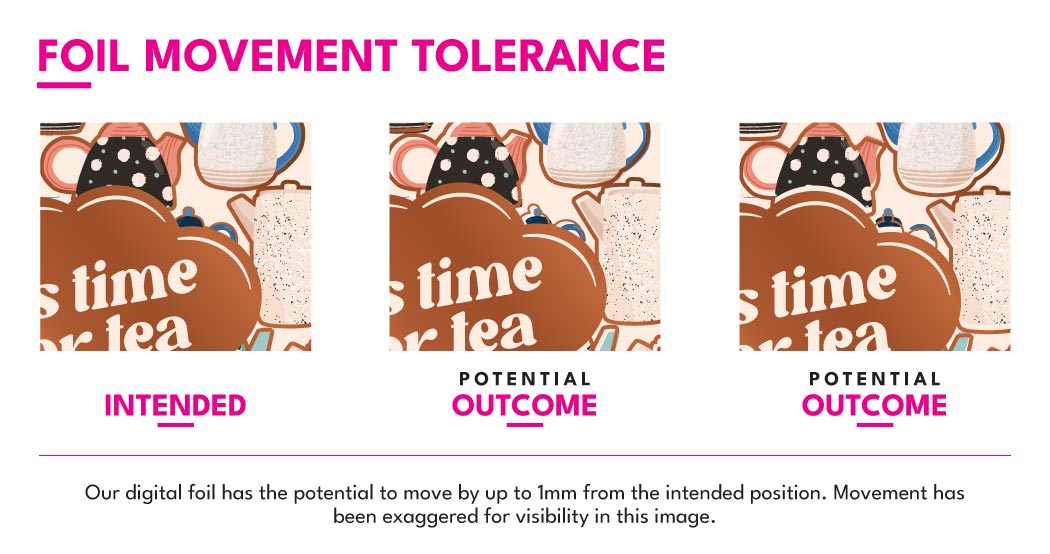
When foil moves, the effects can be visible. Unfortunately, there is no way to stop foil movement, it is going to happen whether we like it or not. But what can be done is altering the artwork to minimise the appearance that this movement will leave behind.
These are our top tips to minimise the appearance of foil movement:
• Don’t leave a gap in the shape of the foil on the print layer. Extend the print smoothly underneath where the foil will land.
• Make the print overlap with the foil if the two touch.
• Avoid foil elements that must land perfectly every single time or are designed to outline the print.
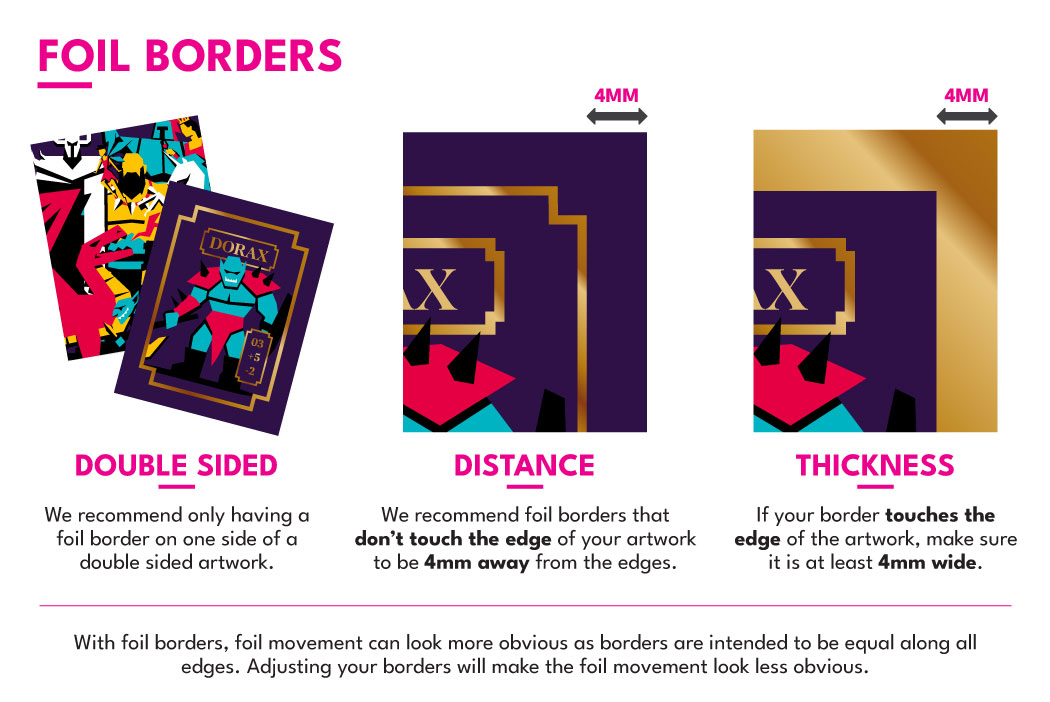
• Keep any foil borders at least 4mm away from each edge.
Borders
Foil borders are a very popular choice for foiled invitations and foiled certificates. But, combined with the foil movement tolerance mentioned above, foil borders have the potential to be the most noticeably out of place if they were to shift.
The reason for this is simple. Borders are designed to be equal all the way around, with an evenly spaced gap between the border and the edge of the page on all sides. If the foil border was to shift, this gap would no longer be even.
Again, we can’t stop foil from moving but we can tweak foil borders to make the movement much less noticeable.
• Keep all borders at least 4mm away from each edge at a minimum.
• For double sided prints, try to only have a foiled border on one side.
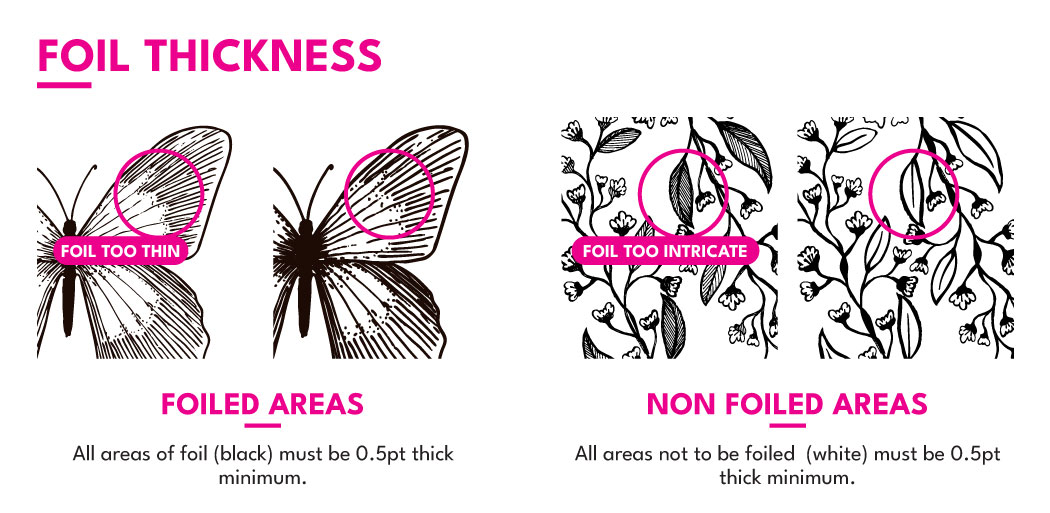
Foil Thickness
The final thing our team might alert you to is the thickness of your foil designs. Intricate designs are cool and all, especially in metallic foil, but did you know that our foil has a minimum thickness?
We recommend keeping all foil elements at a minimum of 0.5pt thick. This will prevent our foil sheets from skipping any parts of your design for being too thin.
The same can be said for non foiled areas. Sometimes, designs will have thin areas within the foil that are not designed to be foiled. These non foiled areas should also be 0.5pt thick at a minimum to prevent the foil from filling it in.
Want To Know More About Foil Printing?
Foil printing is an exciting adventure to undertake. Getting your hands on shimmering and shinning prints will see you never going back to standard printing ever again! If you’d like to know more about the foil printing process, check out our posts for setting your artwork up for foiling and how we keep our foil process eco-friendly.