USA
USA FR
FR


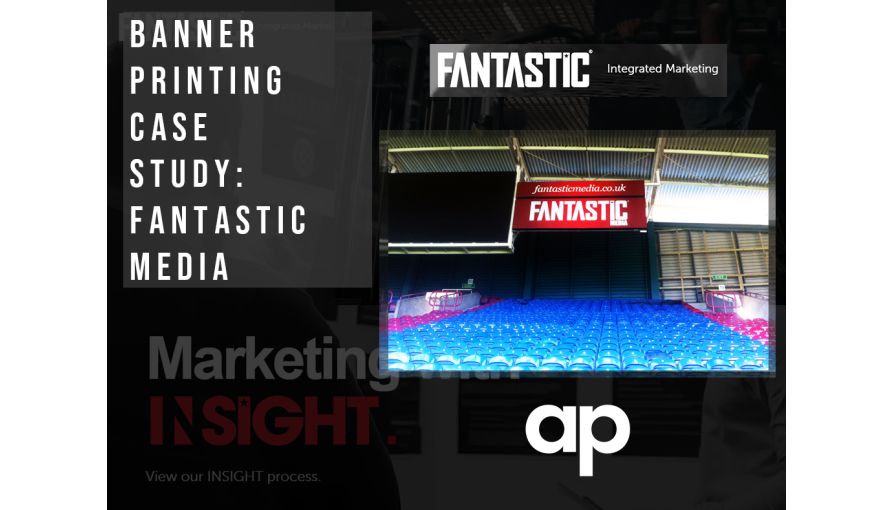
Banner printing case study: Fantastic Media
Initial brief
This job involved making two banners to fit into flexface frames. These are aluminium extruded fixtures with interior lighting, and the banner is then basically stretched over the frame like a drum skin. The artwork was supplied to us by our client, so no design was necessary.
Site survey
Scaffolding erected, next we removed the old advertising banners from the frames for inspection. The banners were laid flat outside and measured carefully. It was very important to ascertain the visible area of the banner, the amount of banner that would be stretched down the sides of the frame (hidden by panel covers) and the size and stitching method of the pole pockets along the edges that hold the metal bars that are used to clamp the banners into the frame. These measurements were checked several times, as a mistake here would lead to a banner that simply would not fit.
Production
Once we were sure that the measurements were correct, the banner artwork was proofed to the customer before printing began. The banners were then printed on a special material used specifically for backlit application – meaning that it would light up with fluorescent tubes behind it (while regular banners would simply block this backlighting). The printing method used was ‘single-strike’, meaning that the print heads only went over the area once – this prevents excess ink coverage from blocking out the light in daylight. Thanks to their design, the stadium banners would be visible during both day and evening games.
Fitting
Again scaffolding was required, as the banner frames were very high up at the John Smith's Stadium. Once in position we unrolled the banners as best we could in the space available. 5mm metal rods were slotted into the pole pockets that ran around the edges of the new banners, ready for clamping. We then hooked the top of the banner into place, and adjusted the tightening bolts so they were at their slackest – this would give us the maximum spare to deal with, and make it easier to get the bottom clamps into position, which we did next.
Once the top and bottom were in place it was easy to clip the sides into place as well. At this point we had a banner that was not yet tensioned, but was in position and ready to tension. This was simply a case of tightening each bolt around the edges and measuring the amount of travel by eye, with a view to keeping the tension on each lug as consistent as possible to avoid any rippling of the banner's surface. After a few passes, the job was done. The lights were switched on, and the banners looked Fantastic!